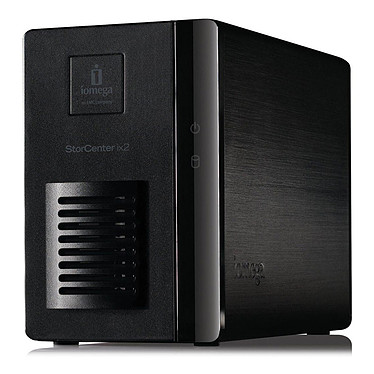
Restore an Iomega / Lenovo Storcenter ix2 without original disks
I found out the hard way that an Iomega / Lenovo Storcenter ix2-ng NAS doesn’t have any onboard flash memory to store the operating system. So after yanking out and repurposing both the original disks that came with the system I was left with a device that wouldn’t boot or recognize new disks.
I’ve pieced together a way to reset the system using information from MyHackBlog and some experimentation, which I’ll put down here, for my own amusement and to save anyone else some time.
Requirements
- USB Drive (> 4 GB)
- SATA Hard drive (any size > 2 GB should do)
- A linux system where you can mount this hard drive
- Lenovo Storcenter ix2 + power adapter
- Network cable and network (for configuring the device). I suppose this is optional, but there aren’t any other ways to check whether or not the reset has worked.
Preparation
- Download the zip file containing all tools from MyHackBlog (AllFilesZipped <- direct link). As far as I can see, these tools were obtained through Iomega / Lenovo support at one point, but they are not available from Lenovo support at the moment. I’ve ran all files through ClamAV, and they come up clean.
- Unzip everything to a location you can easily remember (i.e. Desktop)
Prepare USB stick
- Format the USB drive to FAT32 (instructions for Windows, instructions for Linux)
- Run h4c-4.1.102.29716.exe (I checked this with Virustotal: it’s legit, two false positives because it’s a packed file)
- Select the correct drive to write to and let the tool finish
Prepare Hard Drive
I found out the hard way that you cannot just chuck in an empty disk and let the device format it. The tool on the USB expects zImage and initrd (two essential startup-related tools) to be in the first few sectors of the disk.
The zip file contains compatible versions of zImage and initrd in the \emctools\ix2-ng_images folder.
- Connect the drive to a working Linux system (where you have access to the devices under /dev). I used a Raspberry Pi with a sata attachment, but any Linux-based system should do.
- Copy zImage and initrd to that system.
- Copy them, byte by byte, to the hard disk. Double check which disk you’re copying to! It might (and probably won’t) be at /dev/sda for you! Writing to the wrong disk might render your system unbootable.
sudo dd if=/where/you/saved/zImage of=/dev/sda seek=2048
sudo dd if=/where/you/saved/initrd of=/dev/sda seek=8192
Reset Storcenter ix2
- Mount the prepared hard disk into the first bay of the Storcenter ix2
- Plug in the prepared USB stick into the Storcenter ix2
- Hold the reset button on the back of the device down (using a paperclip or pencil) and hold it for a long time (at least a minute)
- While doing that, insert the power adapter
- The Storcenter will start resetting the device. (You can probably hear the hard disk head moving). If your USB stick has an activity light, it will flash.
- Wait until the Storcenter shuts itself down
- Remove the USB stick
- Plug in the ethernet cable
- Turn on the device
- Wait a few minutes, and figure out what IP the new device was assigned (using your router or the included ipscan24 tool in the ZIP file)
- In the web interface, go to software updates and select the ix2-ng-4.1.114.33421.tgz file (this update is known to be good, you can update further later, if required)
- Wait for the update to install and the device to reboot (remember, the CPU on this thing is pretty slow, can take a while)
And this should get your device back in a functioning state. Now remember, the management software is installed on that first disk. Don’t remove that first disk without adding a second one, or you’re back to square one.

